
“Rye was used in England up to 1700, but is not a typical English corn. The earliest records give mixtures of other grain to help out the gluten.” Dorothy Hartley from Food in England (1954).
‘Maslin’ in Middle English referred to mixed grain (usually rye and wheat) and also to the bread made from a blend of grains (again, usually rye and wheat). Maslin bread was common in medieval Europe, less so in England as wheat growing became more successful.
A mixture of rye and whole wheat flours makes a hearty loaf with a crisp crust. The wheat flour makes the dough more elastic and less dense than a loaf of pure rye. But the rye still gives a special flavour to the bread, different from one made entirely of whole wheat, and the sugars in the rye give it a very crisp crust.
Rye breads stay moist a bit longer than wheat breads. Maslin Bread’s shelf life is somewhere in between the two. But homemade bread of any sort is best eaten fresh within a couple of days of baking. Like rye bread, a maslin loaf freezes well.
Here are the links to less processed ingredient options: Butter, Honey, Whole Wheat Flour, Rye Flour, Olive Oil, Salt, Water.
Equipment
- a Digital Scale
- a Little Bowl to proof the yeast
- 1 Large Bowl in which to let the dough rise
- a Standing Mixer with a Paddle Attachment for mixing the dough or by hand if you prefer
- a Pastry Board
- Parchment Paper
- a Baking Sheet
- a Small Sieve
- a Lame (a razor blade mounted on a handle) or a Sharp Knife to score the loaves before baking them
Ingredients
- 475 g of Stone Ground Whole Wheat Flour
- 125 g of Organic Stone Ground Rye Flour
- 425 ml of Bottled Spring Water divided into 2 parts: 100 ml and 325 ml
- 1 and 1/2 teaspoons of Sea Salt
- 1 teaspoon of Organic Unfiltered Honey
- 1 teaspoon of SAF-Instant Yeast
- a little Salted Butter to grease the bowl in which the dough rises
Making the Bread
Gas or Convection Oven: thefoodlessprocessed uses a gas oven. The conversions from Fahrenheit to Celsius do not attempt to adjust for differences between baking in a gas or convection oven. I have no experience using a convection oven, and leave adjustments to the better judgement of you who do have.
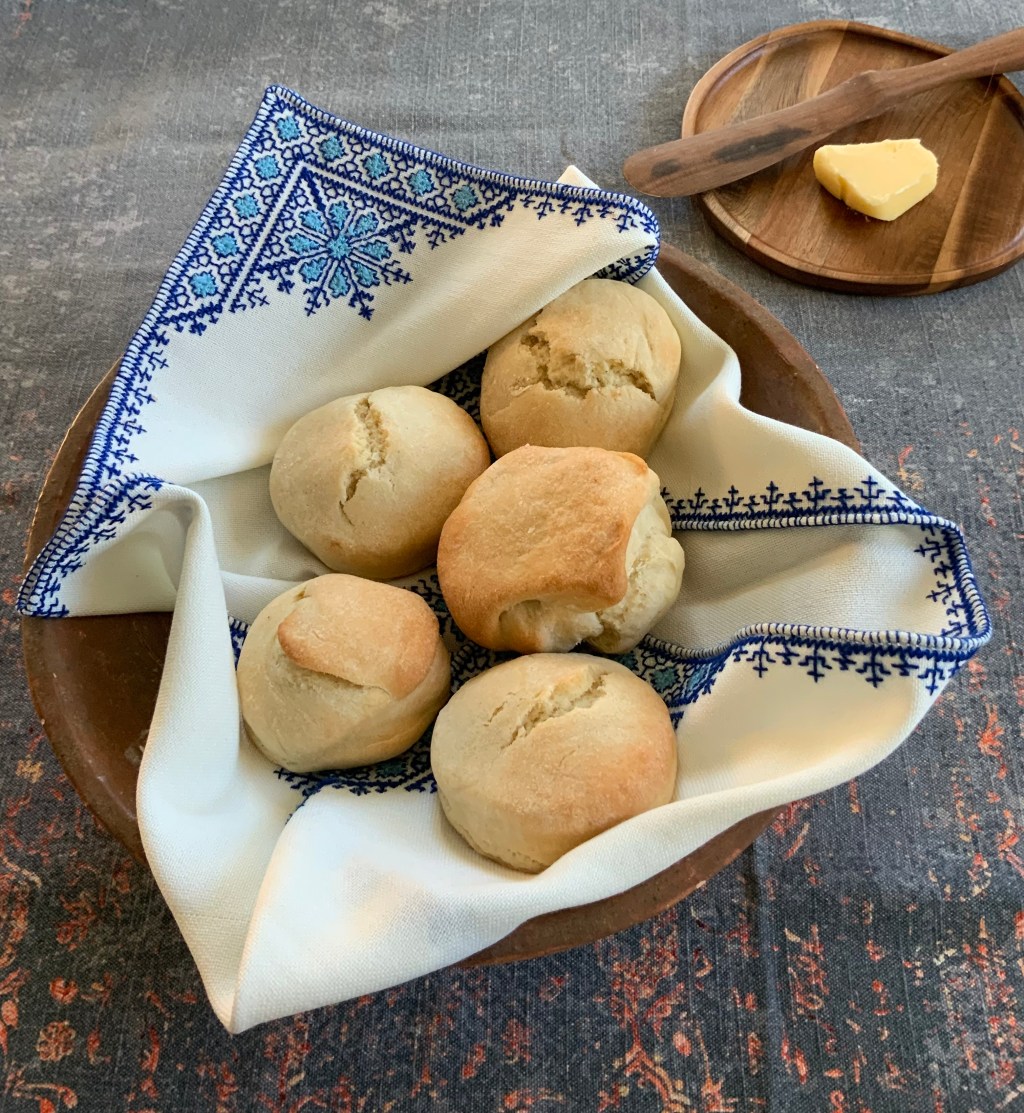
The loaves are formed in the style of a traditional French “boule”., which means rounding the dough into a tight ball, creating surface tension across the top. Here is a video on how to create surface tension on the YouTube site Bake with Jack.
- In a small bowl, add the yeast and honey and 100 ml of warm water. Set it aside. The mixture will become foamy.
- Mix the flours together in a large bowl.
- Add the proofed yeast, the 325 ml of water and the salt.
- Knead the dough. When it tends to come away from the sides of the bowl and does not stick to your hands, it is ready for its first rise. This is a firm dough.
- Put the dough in a buttered bowl, cover it and leave it to double in size.
- When the dough is risen, turn it out onto a floured pastry board, divide it in half and form each half into a smooth, tight round. This is a traditional French shape for a loaf called a “boule”.
- Using a small sieve, sprinkle a parchment-lined baking sheet with flour. Place the loaves on it, cover them with a cotton towel and leave them to rise again to twice their size.
- Preheat the oven to 230 C (445 F).
- Sprinkle the risen loaves with flour. Using the lame or knife, score each loaf once down the middle, then make one additional cut on each side of the center slash.
- Bake the loaves on the center rack at 230 C (445 F) for 15 minutes.
- Reduce the heat to 200 C (392 F, or as close as possible to this temperature) and continue baking the loaves for 35 minutes more.
- Cool the loaves before slicing them.


Leave a comment